Implementing Microservices with NodeJS TypeScript using the Moleculer Framework

Introduction

Moleculer is a fast, modern, and powerful microservices framework for NodeJS. It helps build efficient, reliable, and highly scalable services. Originally designed for JavaScript, Moleculer now supports Typescript and offers a CLI tool that creates boilerplates as easily as Nest, Next, Vite React, and Angular.

Implementing in an Existing NodeJS Project

If you already have a NodeJS project and want to integrate Moleculer, it's simple. Just install the package and use the provided APIs.

yarn add moleculer


To create a service like this:

import {ServiceBroker} from 'moleculer'

const broker = new ServiceBroker()
broker.createService({
name: 'math',
actions: {
add(ctx) {
return Number(ctx.params.a) + Number(ctx.params.b)
},
},
})

broker
.start()
.then(() => broker.call('math.add', {a: 1, b: 2}))
.then((res: number) => console.log('1 + 2 =', res))


The result when the service starts successfully


Creating a Boilerplate with a CLI Tool

First, you need to install the CLI tool.

npm install -g moleculer-cli


Next, let's create a template codebase for NodeJS with TypeScript.

Init Typescript template

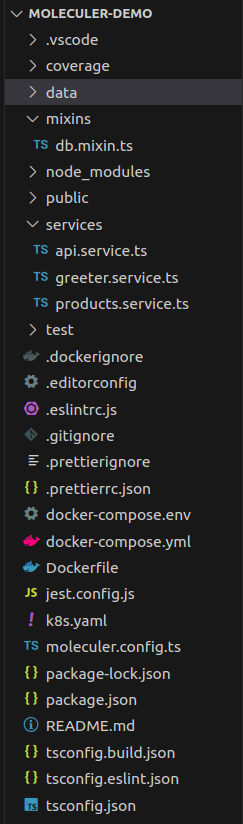
Once the setup is complete, the codebase will include all necessary resources such as:

  • Folder mixins: A flexible way to distribute reusable functionalities for Moleculer services.
  • Folder services: Pre-defined default services.
  • Folder test: Uses Jest for testing.
  • File moleculer.config.ts: For configuration purposes.
  • DockerFile: To build the Docker image, and docker compose to start with Docker.
  • k8s.yml: To start with Kubernetes.
  • Prettier: To format code.
  • ESLint: To check syntax according to the rules defined during development.

Project structure

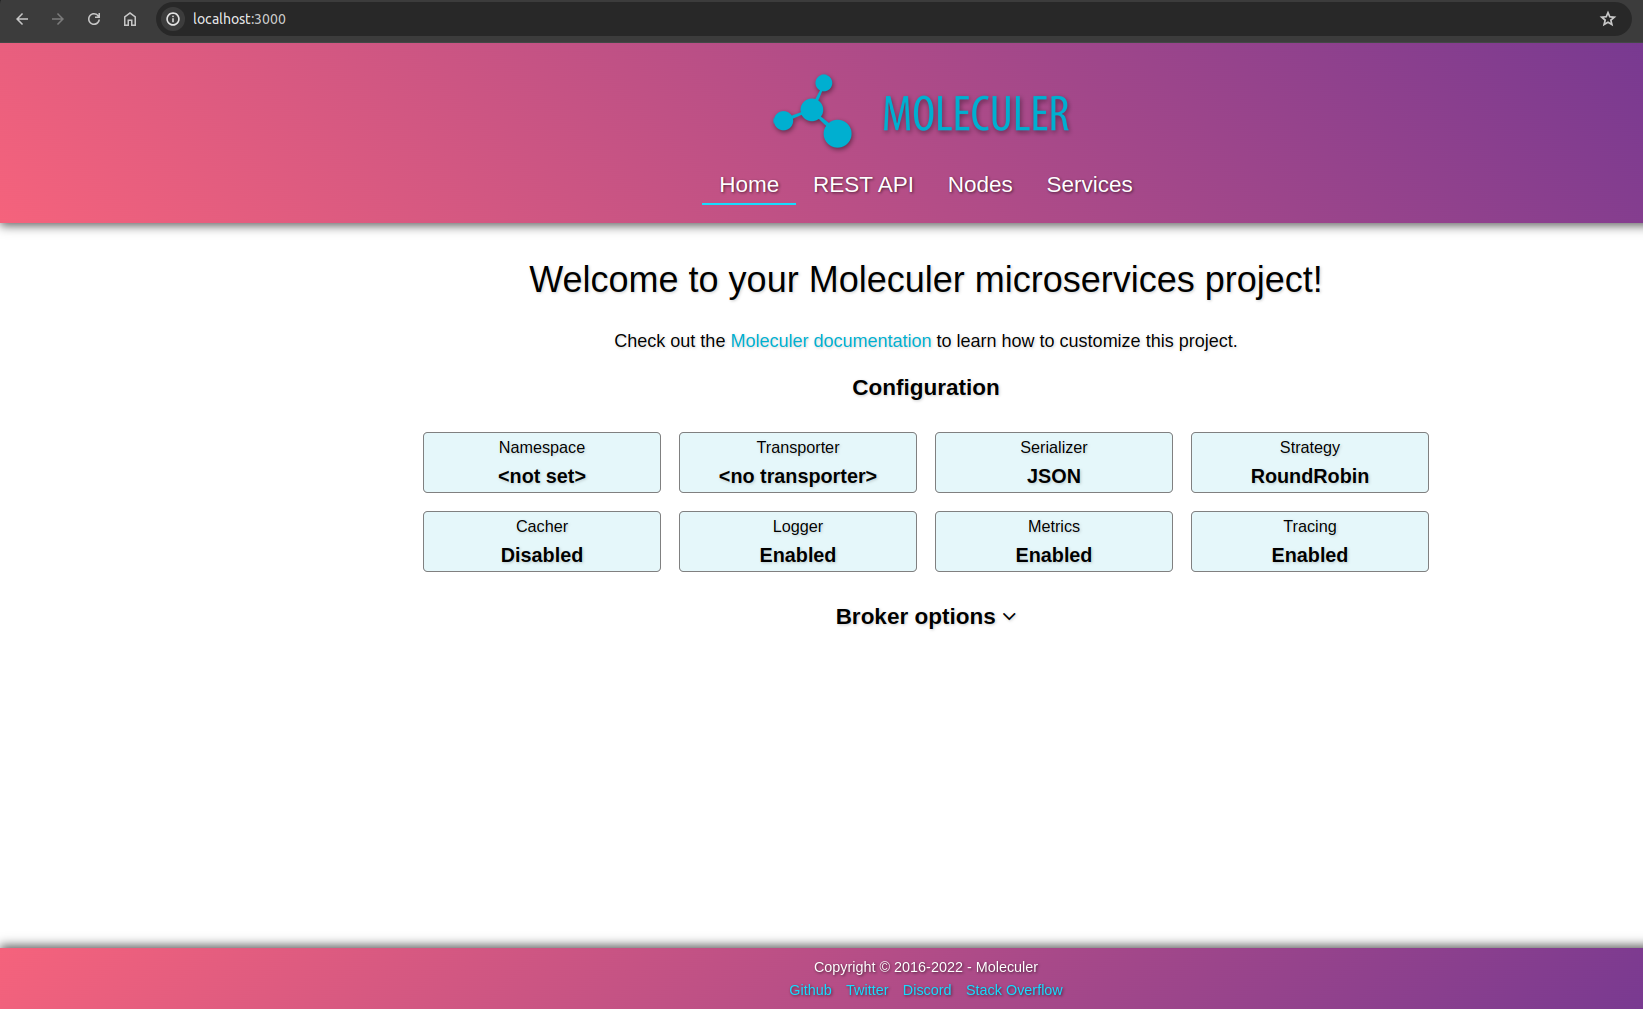
To start the project:

yarn dev


When you access the homepage, you'll find information about the components of Microservices, Rest API, Nodes, and Services.


Restful API document


Codebase Explanation

APIService

In the `services/api.service.ts` file, some default configuration info is defined, which you can change as needed, such as:

const ApiService: ServiceSchema<ApiSettingsSchema> = {
settings: {
port: process.env.PORT != null ? Number(process.env.PORT) : 3000,
routes: [
{
path: "/api",
},
],
}
};

You can see that the default port used is 3000, and the prefix to access the Restful API is `/api`.


GreeterService

Let's take a look at a simple service defined in `services/greeter.service.ts`.

const GreeterService: ServiceSchema<GreeterSettings> = {
name: "greeter",

/**
* Settings
*/
settings: {
defaultName: "Moleculer",
},

/**
* Actions
*/
actions: {
hello: {
rest: {
method: "GET",
path: "/hello",
},
handler(this: GreeterThis/* , ctx: Context */): string {
return `Hello ${this.settings.defaultName}`;
},
},

welcome: {
rest: "GET /welcome/:name",
params: {
name: "string",
},
handler(this: GreeterThis, ctx: Context<ActionHelloParams>): string {
return `Welcome, ${ctx.params.name}`;
},
},
},
};

You can see that the two actions defined are equivalent to two services. They clearly define the GET method, path, and parameters. There are two ways to use these actions:

1. Use them directly through the NodeJS REPL after starting the microservices

call greeter.hello
call greeter.welcome --name=ABC


2. Calling via Restful API


ProductService

Next, let's move on to a more complex service: `services/product.service.ts`.

First, let's take a look at the Mixins and Methods being used.

const ProductsService: ServiceSchema<ProductSettings> & { methods: DbServiceMethods } = {
name: "products",
/**
* Mixins
*/
mixins: [DbMixin("products")],

/**
* Methods
*/
methods: {
/**
* Loading sample data to the collection.
* It is called in the DB.mixin after the database
* connection establishing & the collection is empty.
*/
async seedDB(this: ProductsThis) {
await this.adapter.insertMany([
{ name: "Samsung Galaxy S10 Plus", quantity: 10, price: 704 },
{ name: "iPhone 11 Pro", quantity: 25, price: 999 },
{ name: "Huawei P30 Pro", quantity: 15, price: 679 },
]);
},
},
}


The methods defined will be used in ProductService or in Mixins. In this case, the `seedDB` method is used to create default data after establishing a database connection and if the collection is empty. This implementation is defined in `mixins/db.mixin.ts` with the `started` function.

async started(this: DbServiceThis) {
// Check the count of items in the DB. If it's empty,
// call the `seedDB` method of the service.
if (this.seedDB) {
const count = await this.adapter.count();
if (count === 0) {
this.logger.info(
`The '${collection}' collection is empty. Seeding the collection...`,
);
await this.seedDB();
this.logger.info(
"Seeding is done. Number of records:",
await this.adapter.count(),
);
}
}
}


Next, let's connect to the database defined by the environment variables:

  • If `MONGO_URI` is defined, we will use MongoDB.
  • If `NODE_ENV` is set to `test`, data will be stored in memory.
  • By default, data will be saved to the file `data/products.db`, with the product name provided when calling the `DbMixin("products")` mixin.

if (process.env.MONGO_URI) {
// Mongo adapter
schema.adapter = new MongoDbAdapter(process.env.MONGO_URI);
schema.collection = collection;
} else if (process.env.NODE_ENV === "test") {
// NeDB memory adapter for testing
schema.adapter = new DbService.MemoryAdapter();
} else {
// NeDB file DB adapter

// Create data folder
if (!fs.existsSync("./data")) {
fs.mkdirSync("./data");
}

schema.adapter = new DbService.MemoryAdapter({ filename: `./data/${collection}.db` });
}


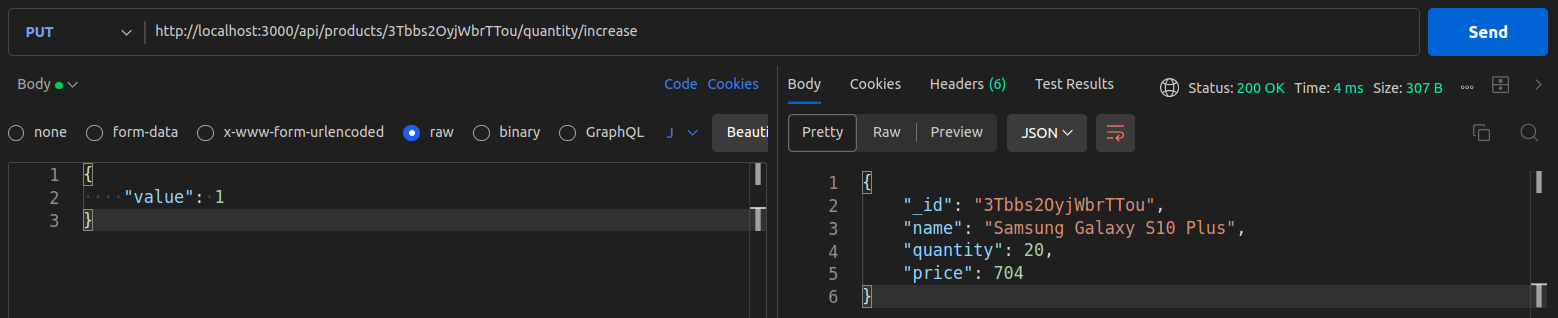
Next up are the actions. Since we're using Mixin with `moleculer-db`, it automatically injects default actions like list, find, count, create, insert, update, and remove into the ProductService action for interacting with the Product entity. Additionally, we define two more actions to increase or decrease the product quantity.

const ProductsService: ServiceSchema<ProductSettings> & { methods: DbServiceMethods } = {
name: "products",
actions: {
/**
* The "moleculer-db" mixin registers the following actions:
* - list
* - find
* - count
* - create
* - insert
* - update
* - remove
*/

// --- ADDITIONAL ACTIONS ---

/**
* Increase the quantity of the product item.
*/
increaseQuantity: {
rest: "PUT /:id/quantity/increase",
params: {
id: "string",
value: "number|integer|positive",
},
async handler(this: ProductsThis, ctx: Context<ActionQuantityParams>): Promise<object> {
const doc = await this.adapter.updateById(ctx.params.id, {
$inc: { quantity: ctx.params.value },
});
const json = await this.transformDocuments(ctx, ctx.params, doc);
await this.entityChanged("updated", json, ctx);
return json;
},
},

/**
* Decrease the quantity of the product item.
*/
decreaseQuantity: {
rest: "PUT /:id/quantity/decrease",
params: {
id: "string",
value: "number|integer|positive",
},
async handler(this: ProductsThis, ctx: Context<ActionQuantityParams>): Promise<object> {
const doc = await this.adapter.updateById(ctx.params.id, {
$inc: { quantity: -ctx.params.value },
});
const json = await this.transformDocuments(ctx, ctx.params, doc);
await this.entityChanged("updated", json, ctx);
return json;
},
},
}
}


Here are the results of the RESTful API call:


If you have any suggestions or questions about the content of this article, please feel free to leave a comment below!

Comments

Popular posts from this blog

Kubernetes Practice Series

NodeJS Practice Series

Docker Practice Series

Deploying a NodeJS Server on Google Kubernetes Engine

Setting up Kubernetes Dashboard with Kind

React Practice Series

Sitemap

Using Kafka with Docker and NodeJS

Create API Gateway with fast-gateway

DevOps Practice Series